
Import Your Jira Project into TrackFlow
Export your Jira project as a CSV file and seamlessly import your work items into TrackFlow in just a few steps.
How to Export Data from Jira
Follow these steps inside Jira to download your project data as a CSV file with all fields.
Open Jira
Open your Jira workspace and navigate to:
your-domain.atlassian.net/jira/for-you?tab=workedon
From the left sidebar, locate and click Filter.
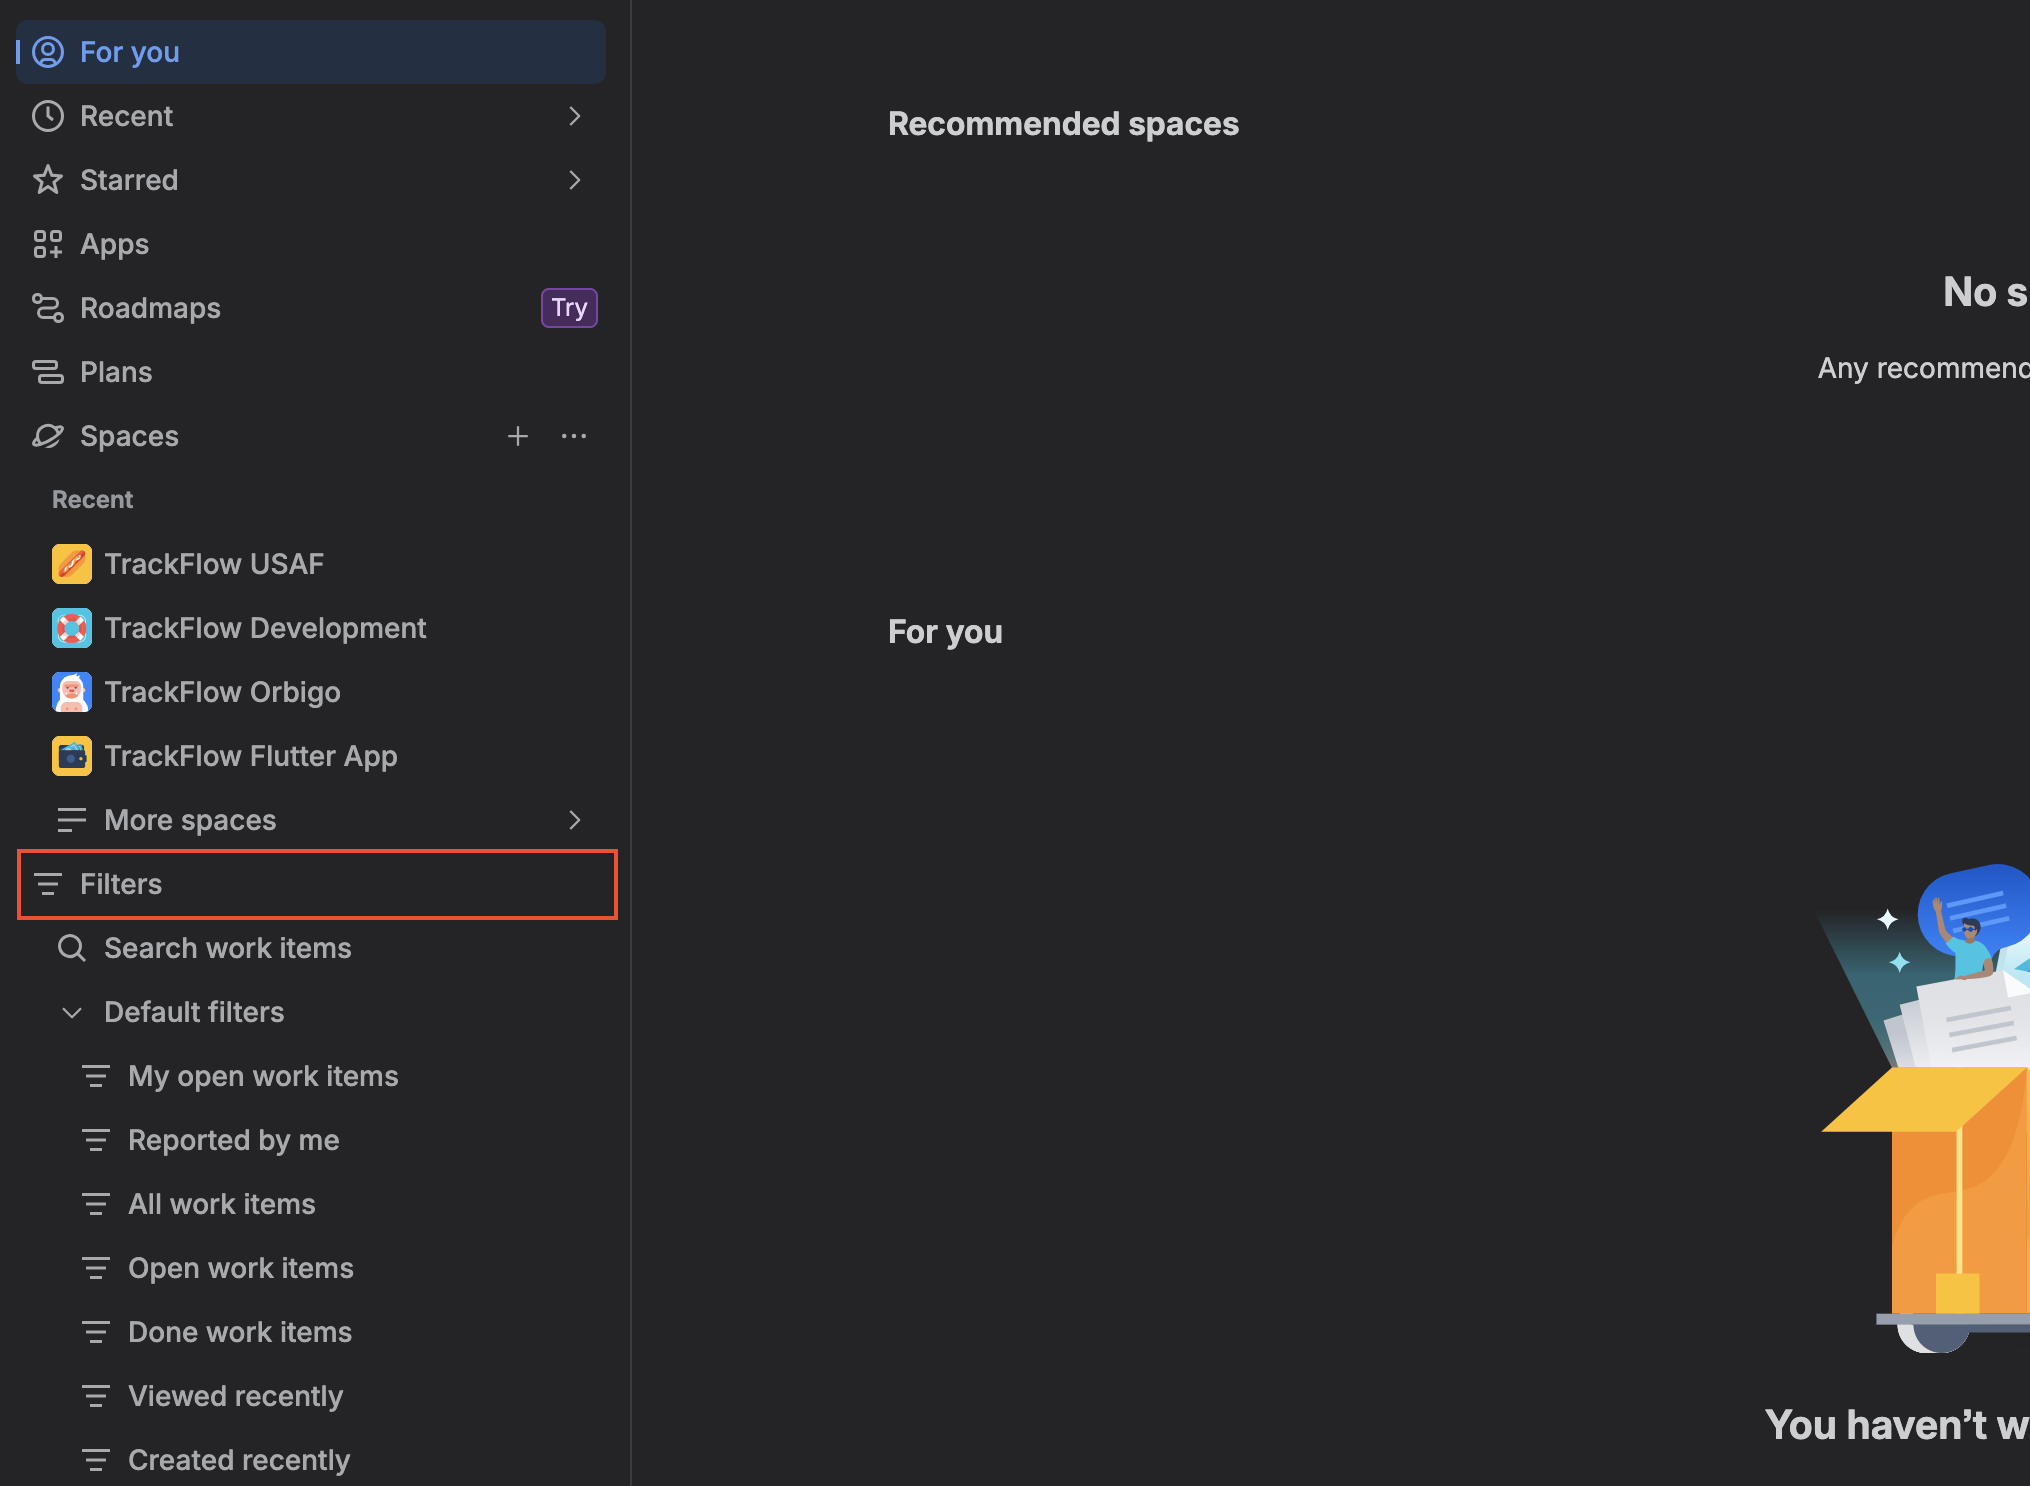
Open Advanced Work Item Search
After clicking Filter, open the work item search page. You should see options such as:
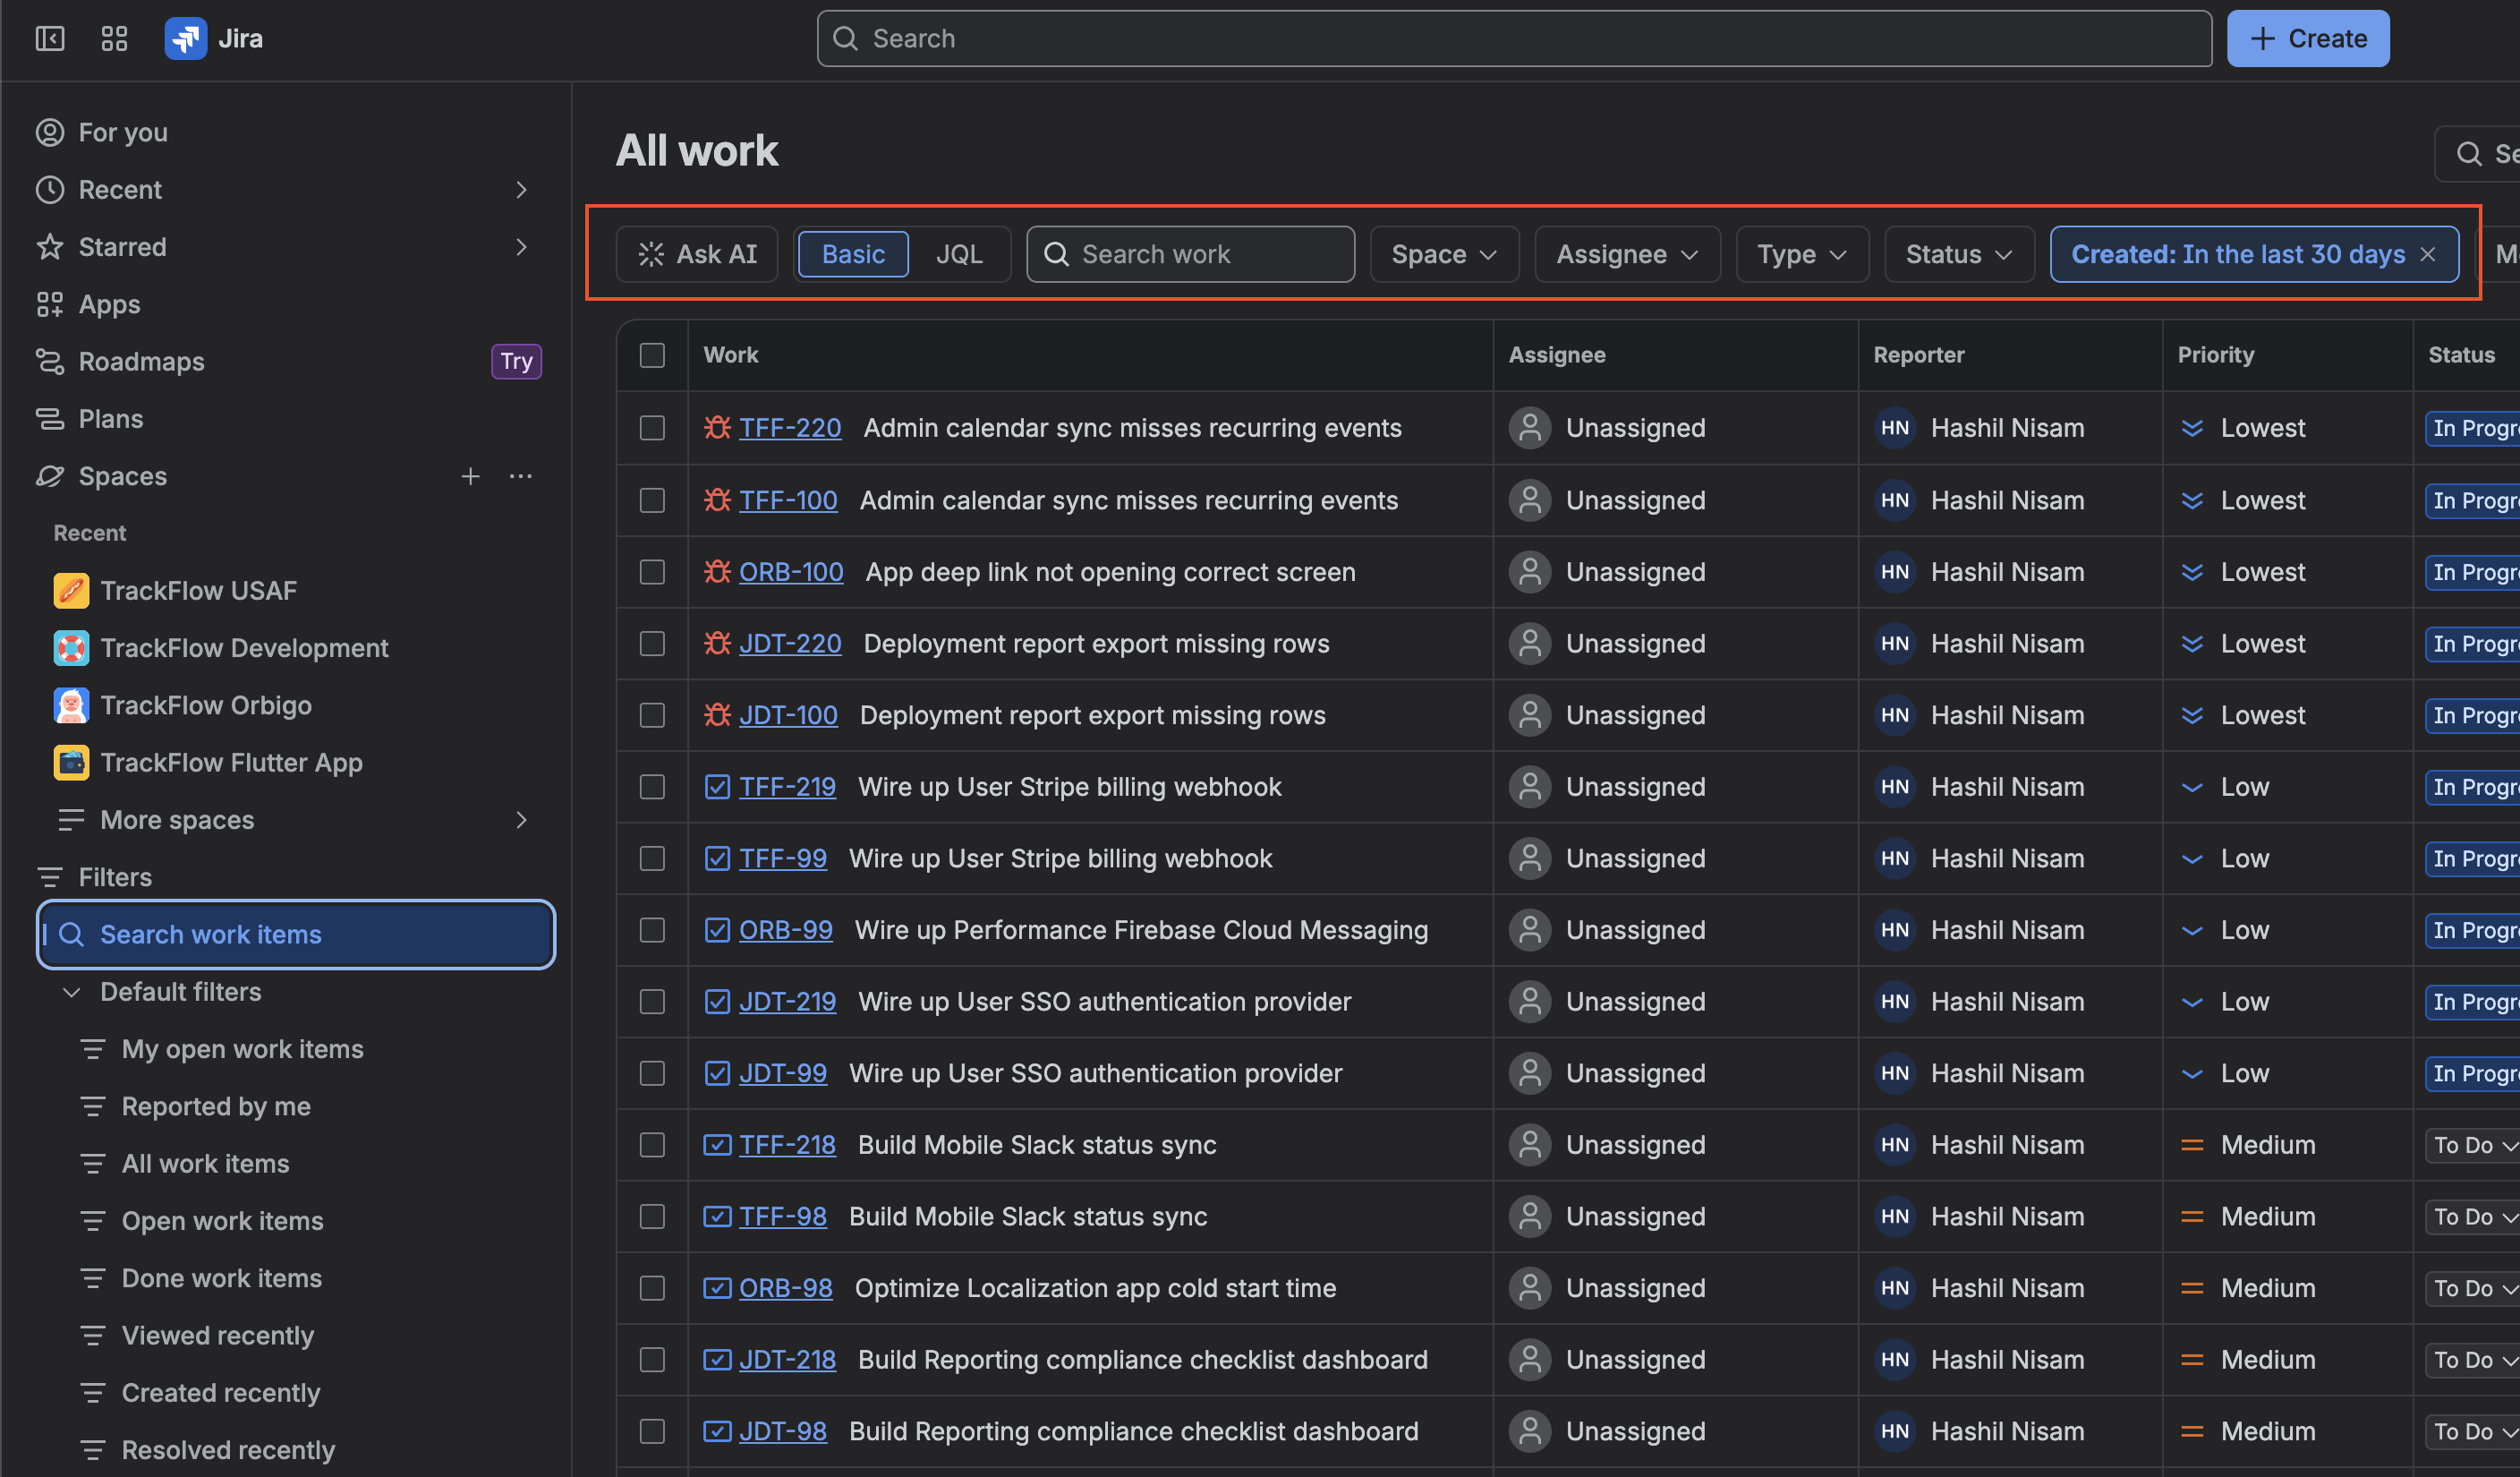
Remove the Default Created Date Filter
By default, Jira may show Created: In the last 30 days. Remove or untick this filter.
This ensures that all work items in the project are included, not only items created within the last 30 days.
Select Your Jira Project
Click the Space dropdown and select the Jira project you want to export. After selecting the project, Jira will display the work items associated with that project.
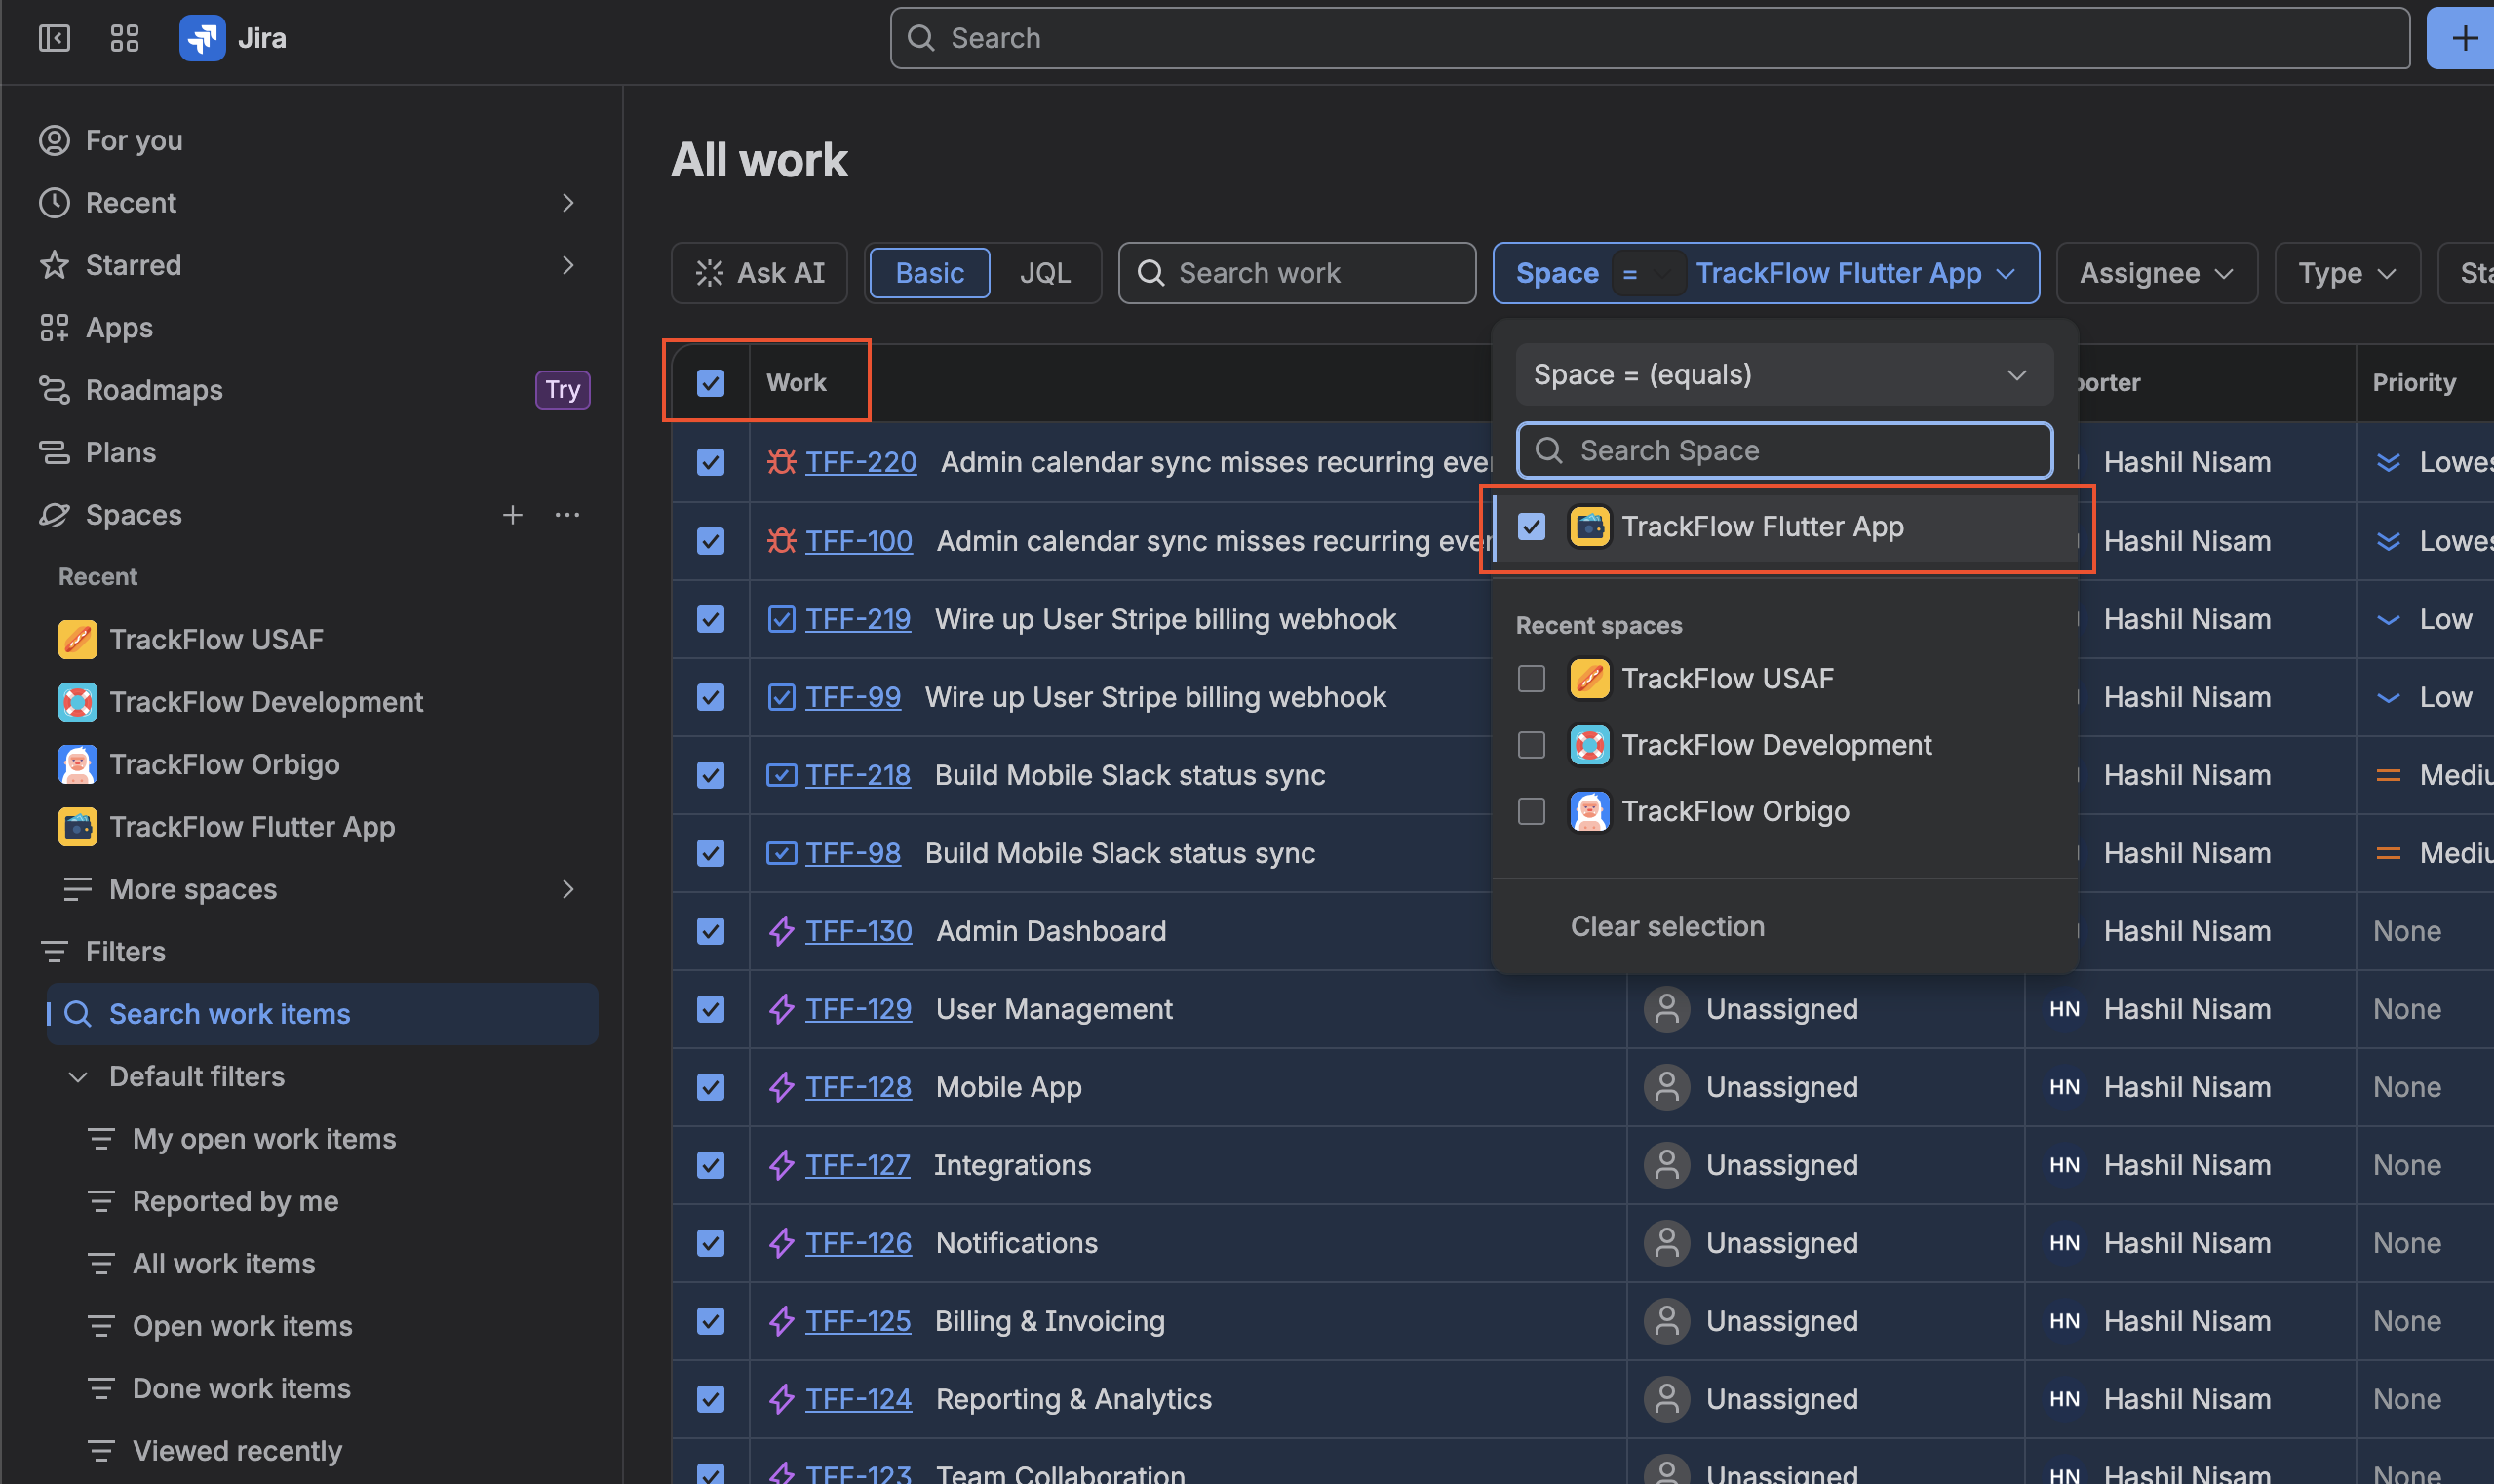
Select All Work Items
In the work items table, locate the selection checkbox at the top-left of the table. Tick the checkbox to select all work items. This should include:
- Epics
- Stories
- Tasks
- Bugs
- Subtasks
Export the Jira Project
After selecting all work items:
- Click the three-dot More Actions menu in the top-right area.
- Select Export.
- Choose CSV — All Fields.
Jira will then generate and download the CSV file containing the project data.
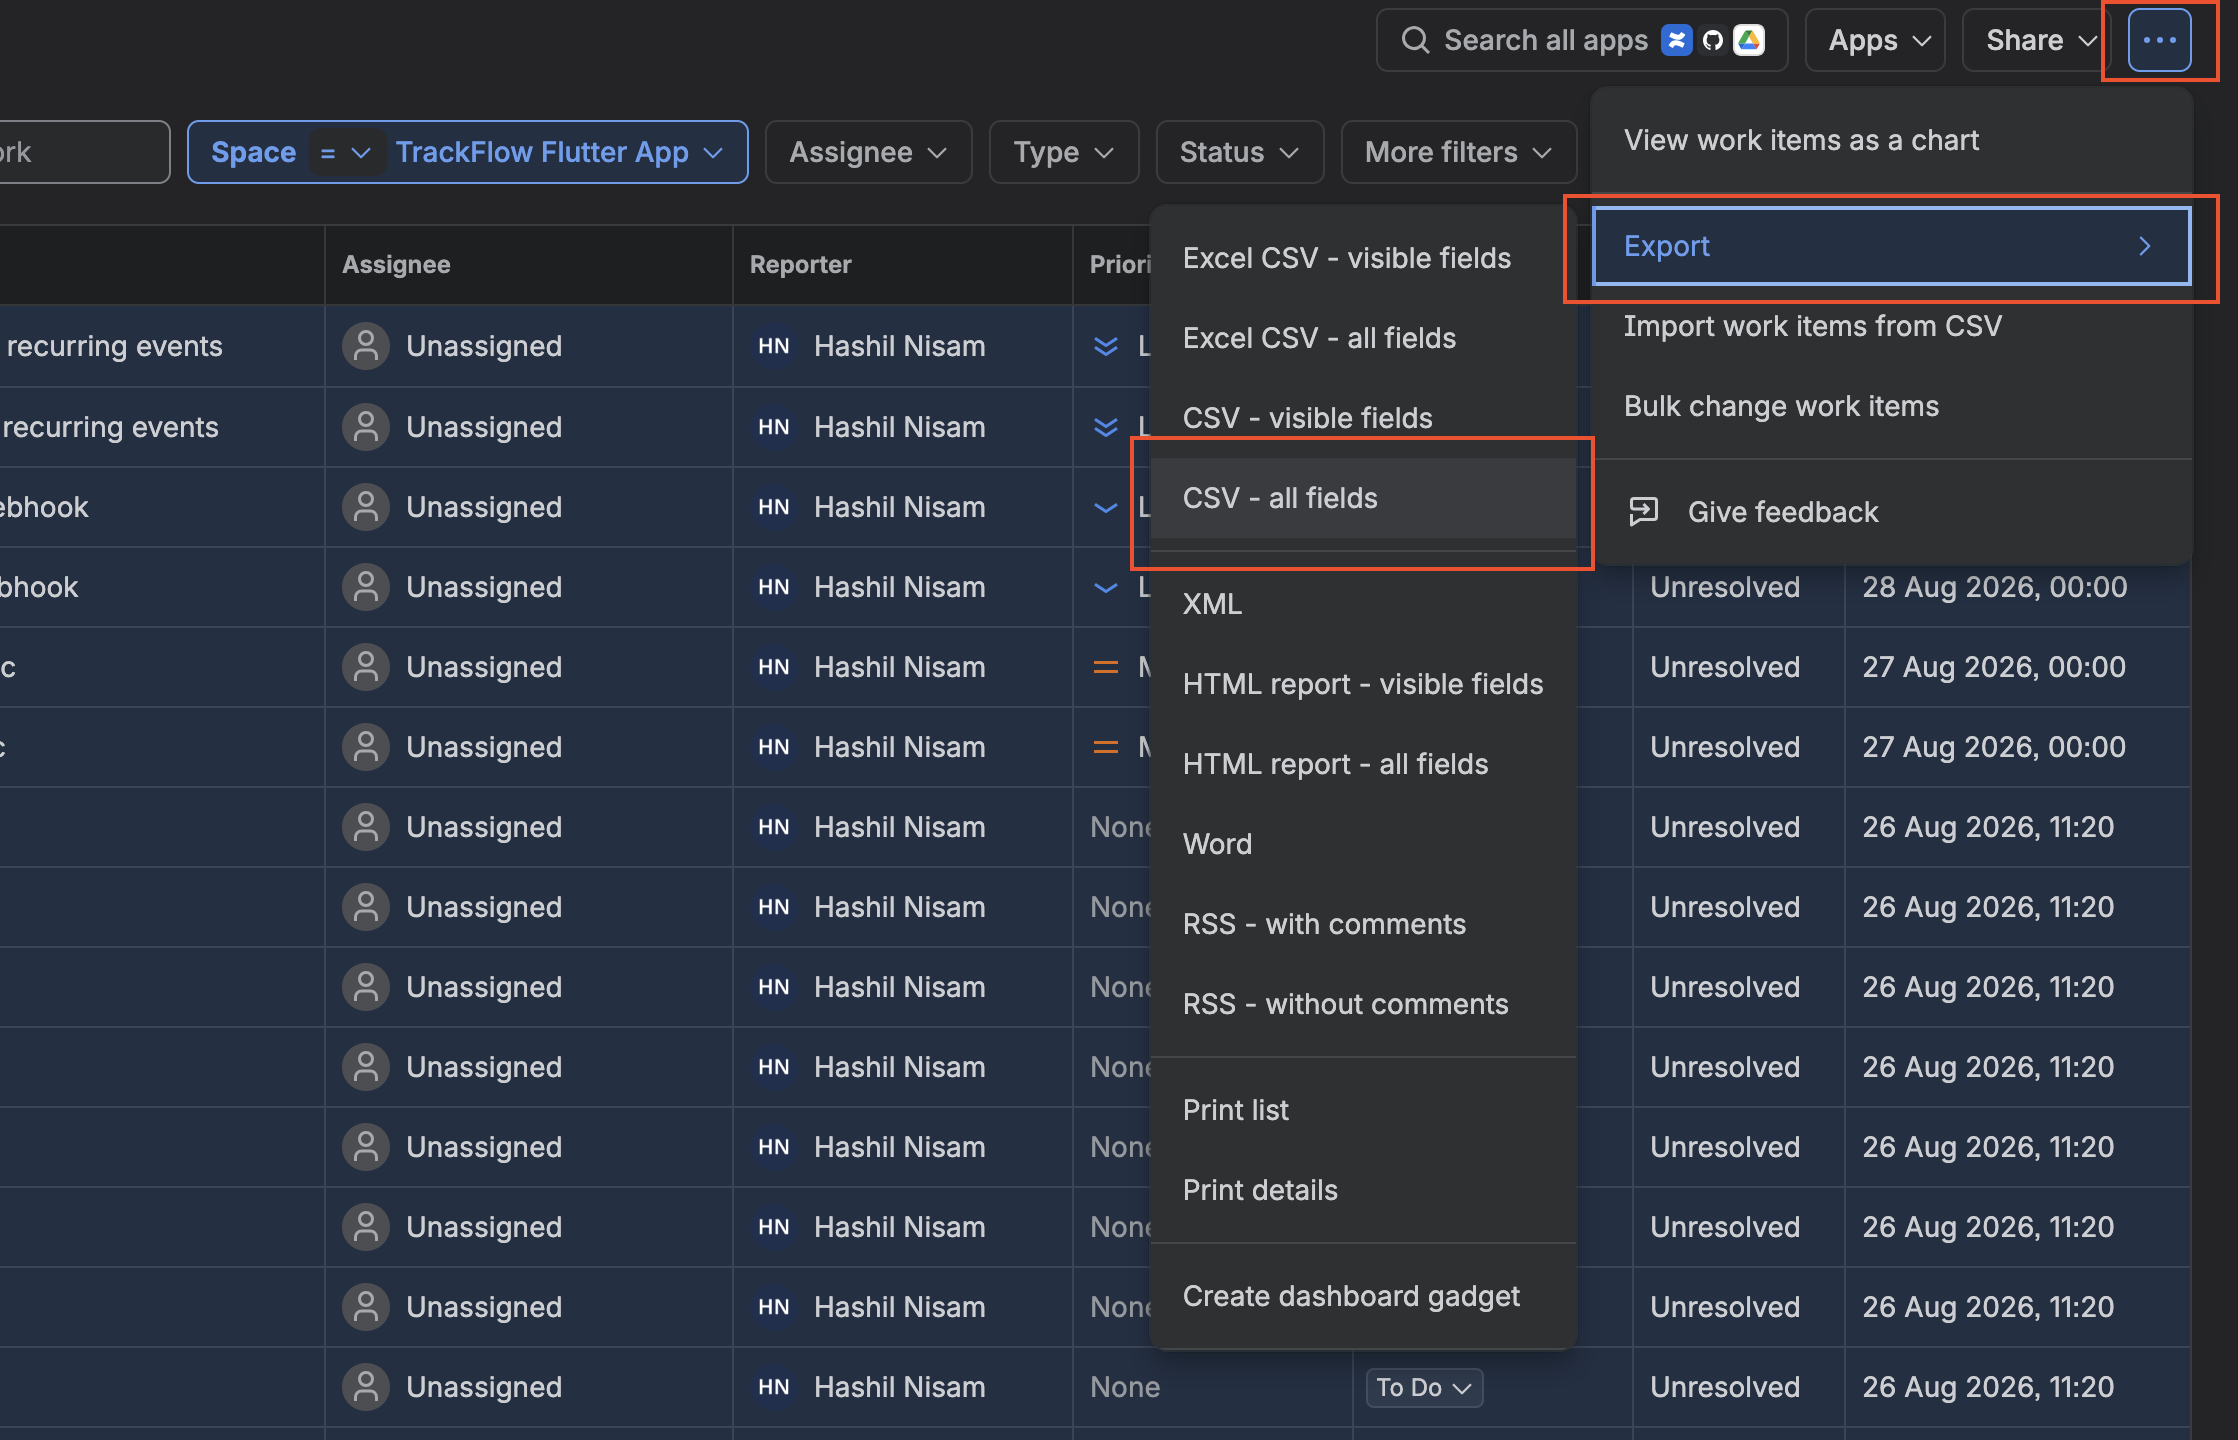
Important: Use the CSV — All Fields export option to ensure TrackFlow receives all required Jira fields and hierarchy information.
Import the CSV into TrackFlow
Once you have the Jira CSV file, switch to TrackFlow to import your project data.
Open Your TrackFlow Project
Log in to TrackFlow and open the project where you want to import the Jira data.
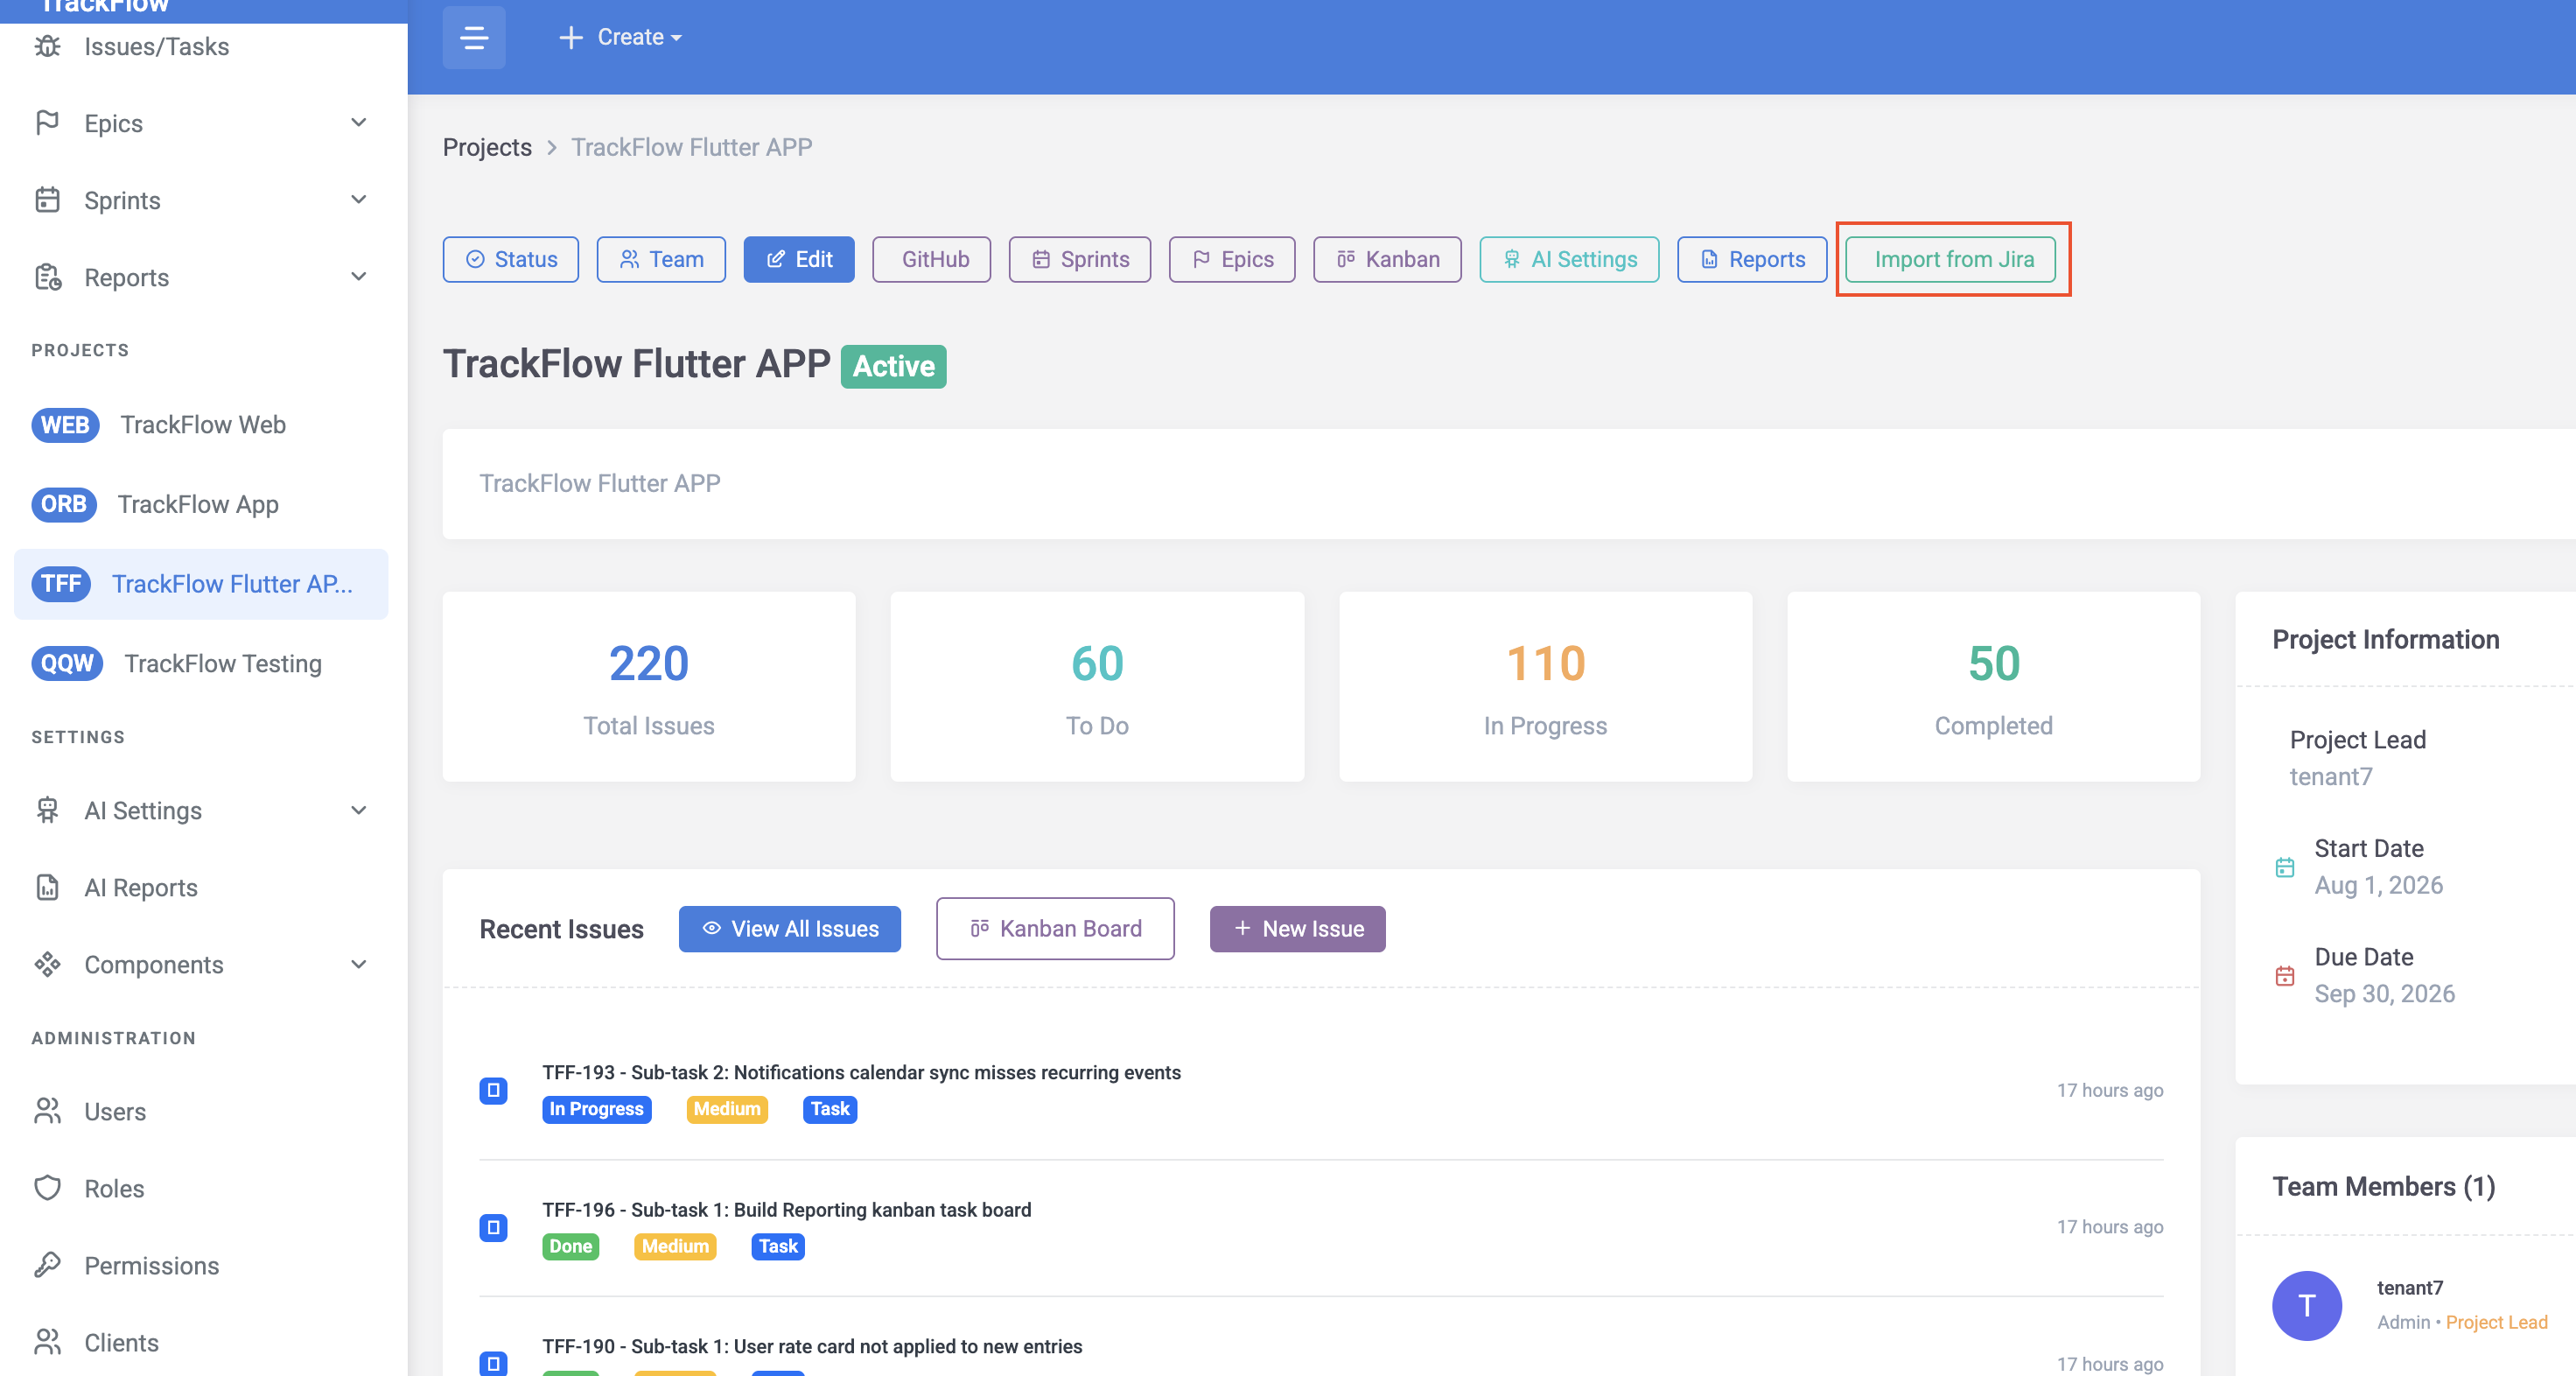
Click Import from Jira
In the project page, locate the Import from Jira button in the top-right area. Click it. This should open the dedicated Jira CSV import page.
Upload Jira CSV
On the Jira import page, click the upload area or file selection button. Select the CSV file that was downloaded from Jira. The interface should clearly display the selected file before import.
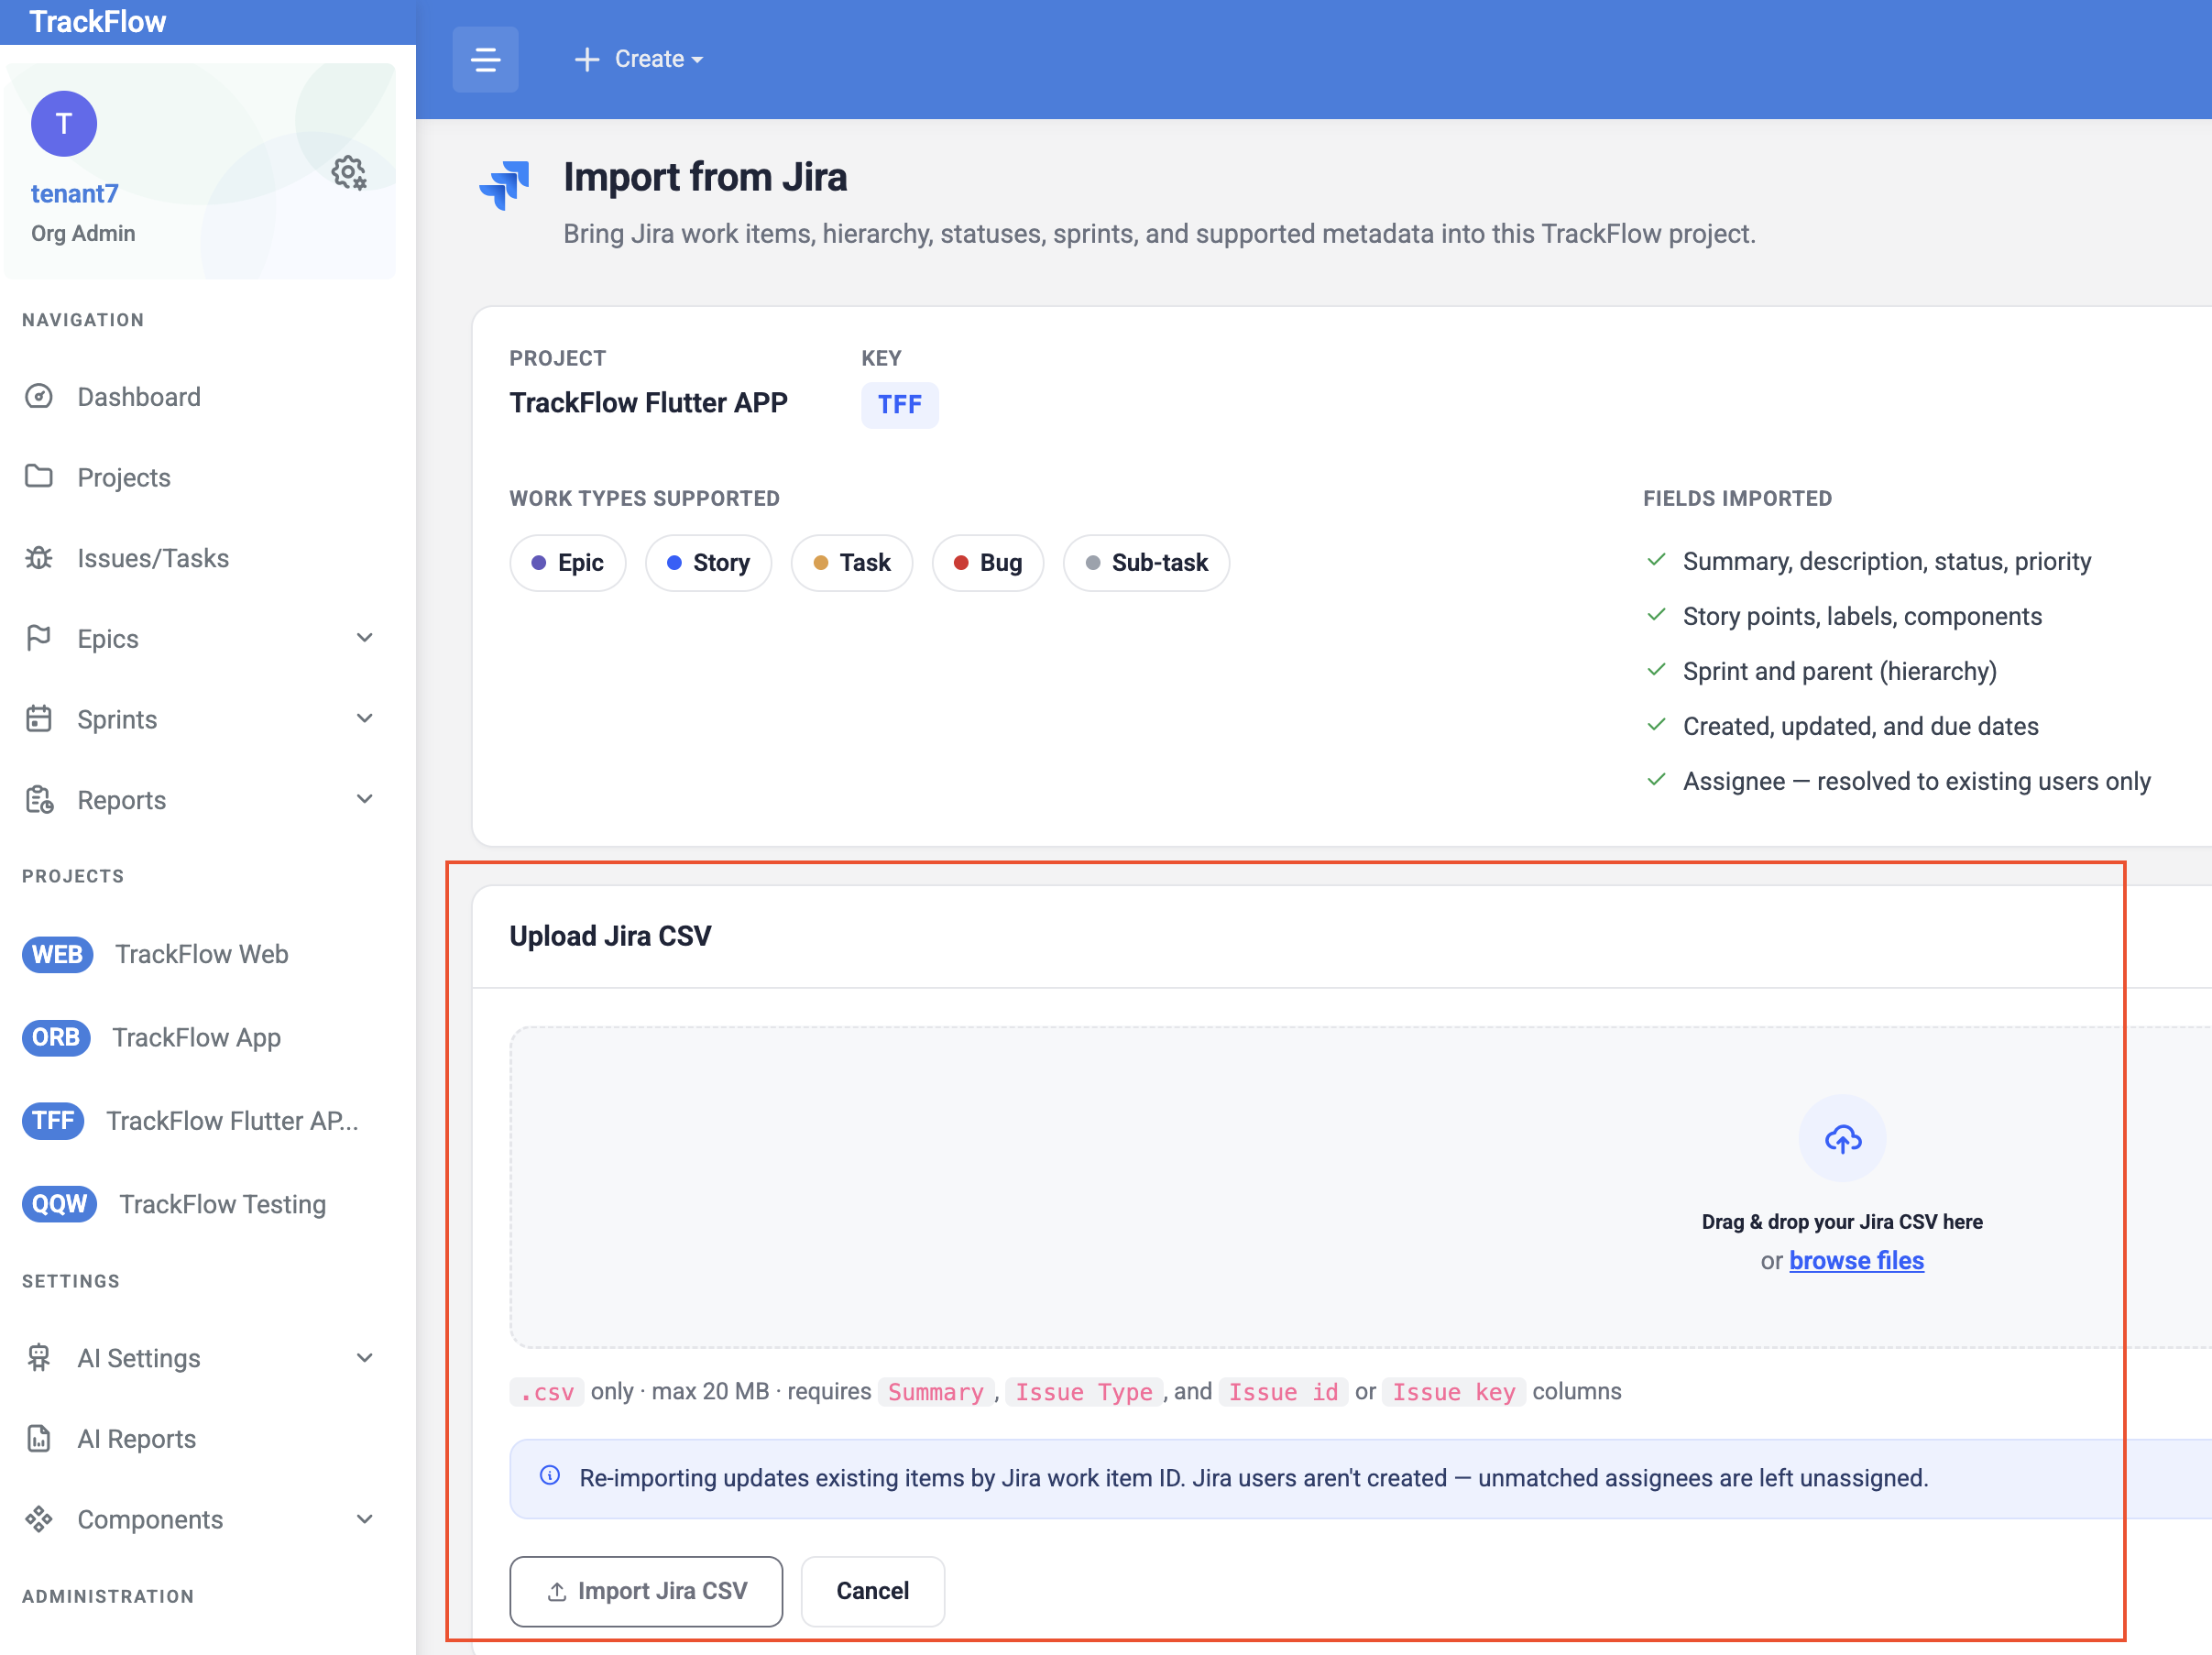
Import Jira CSV
After selecting the file, click Import Jira CSV. TrackFlow should validate and process the CSV file. The import process preserves the Jira project structure and correctly imports supported work item relationships.
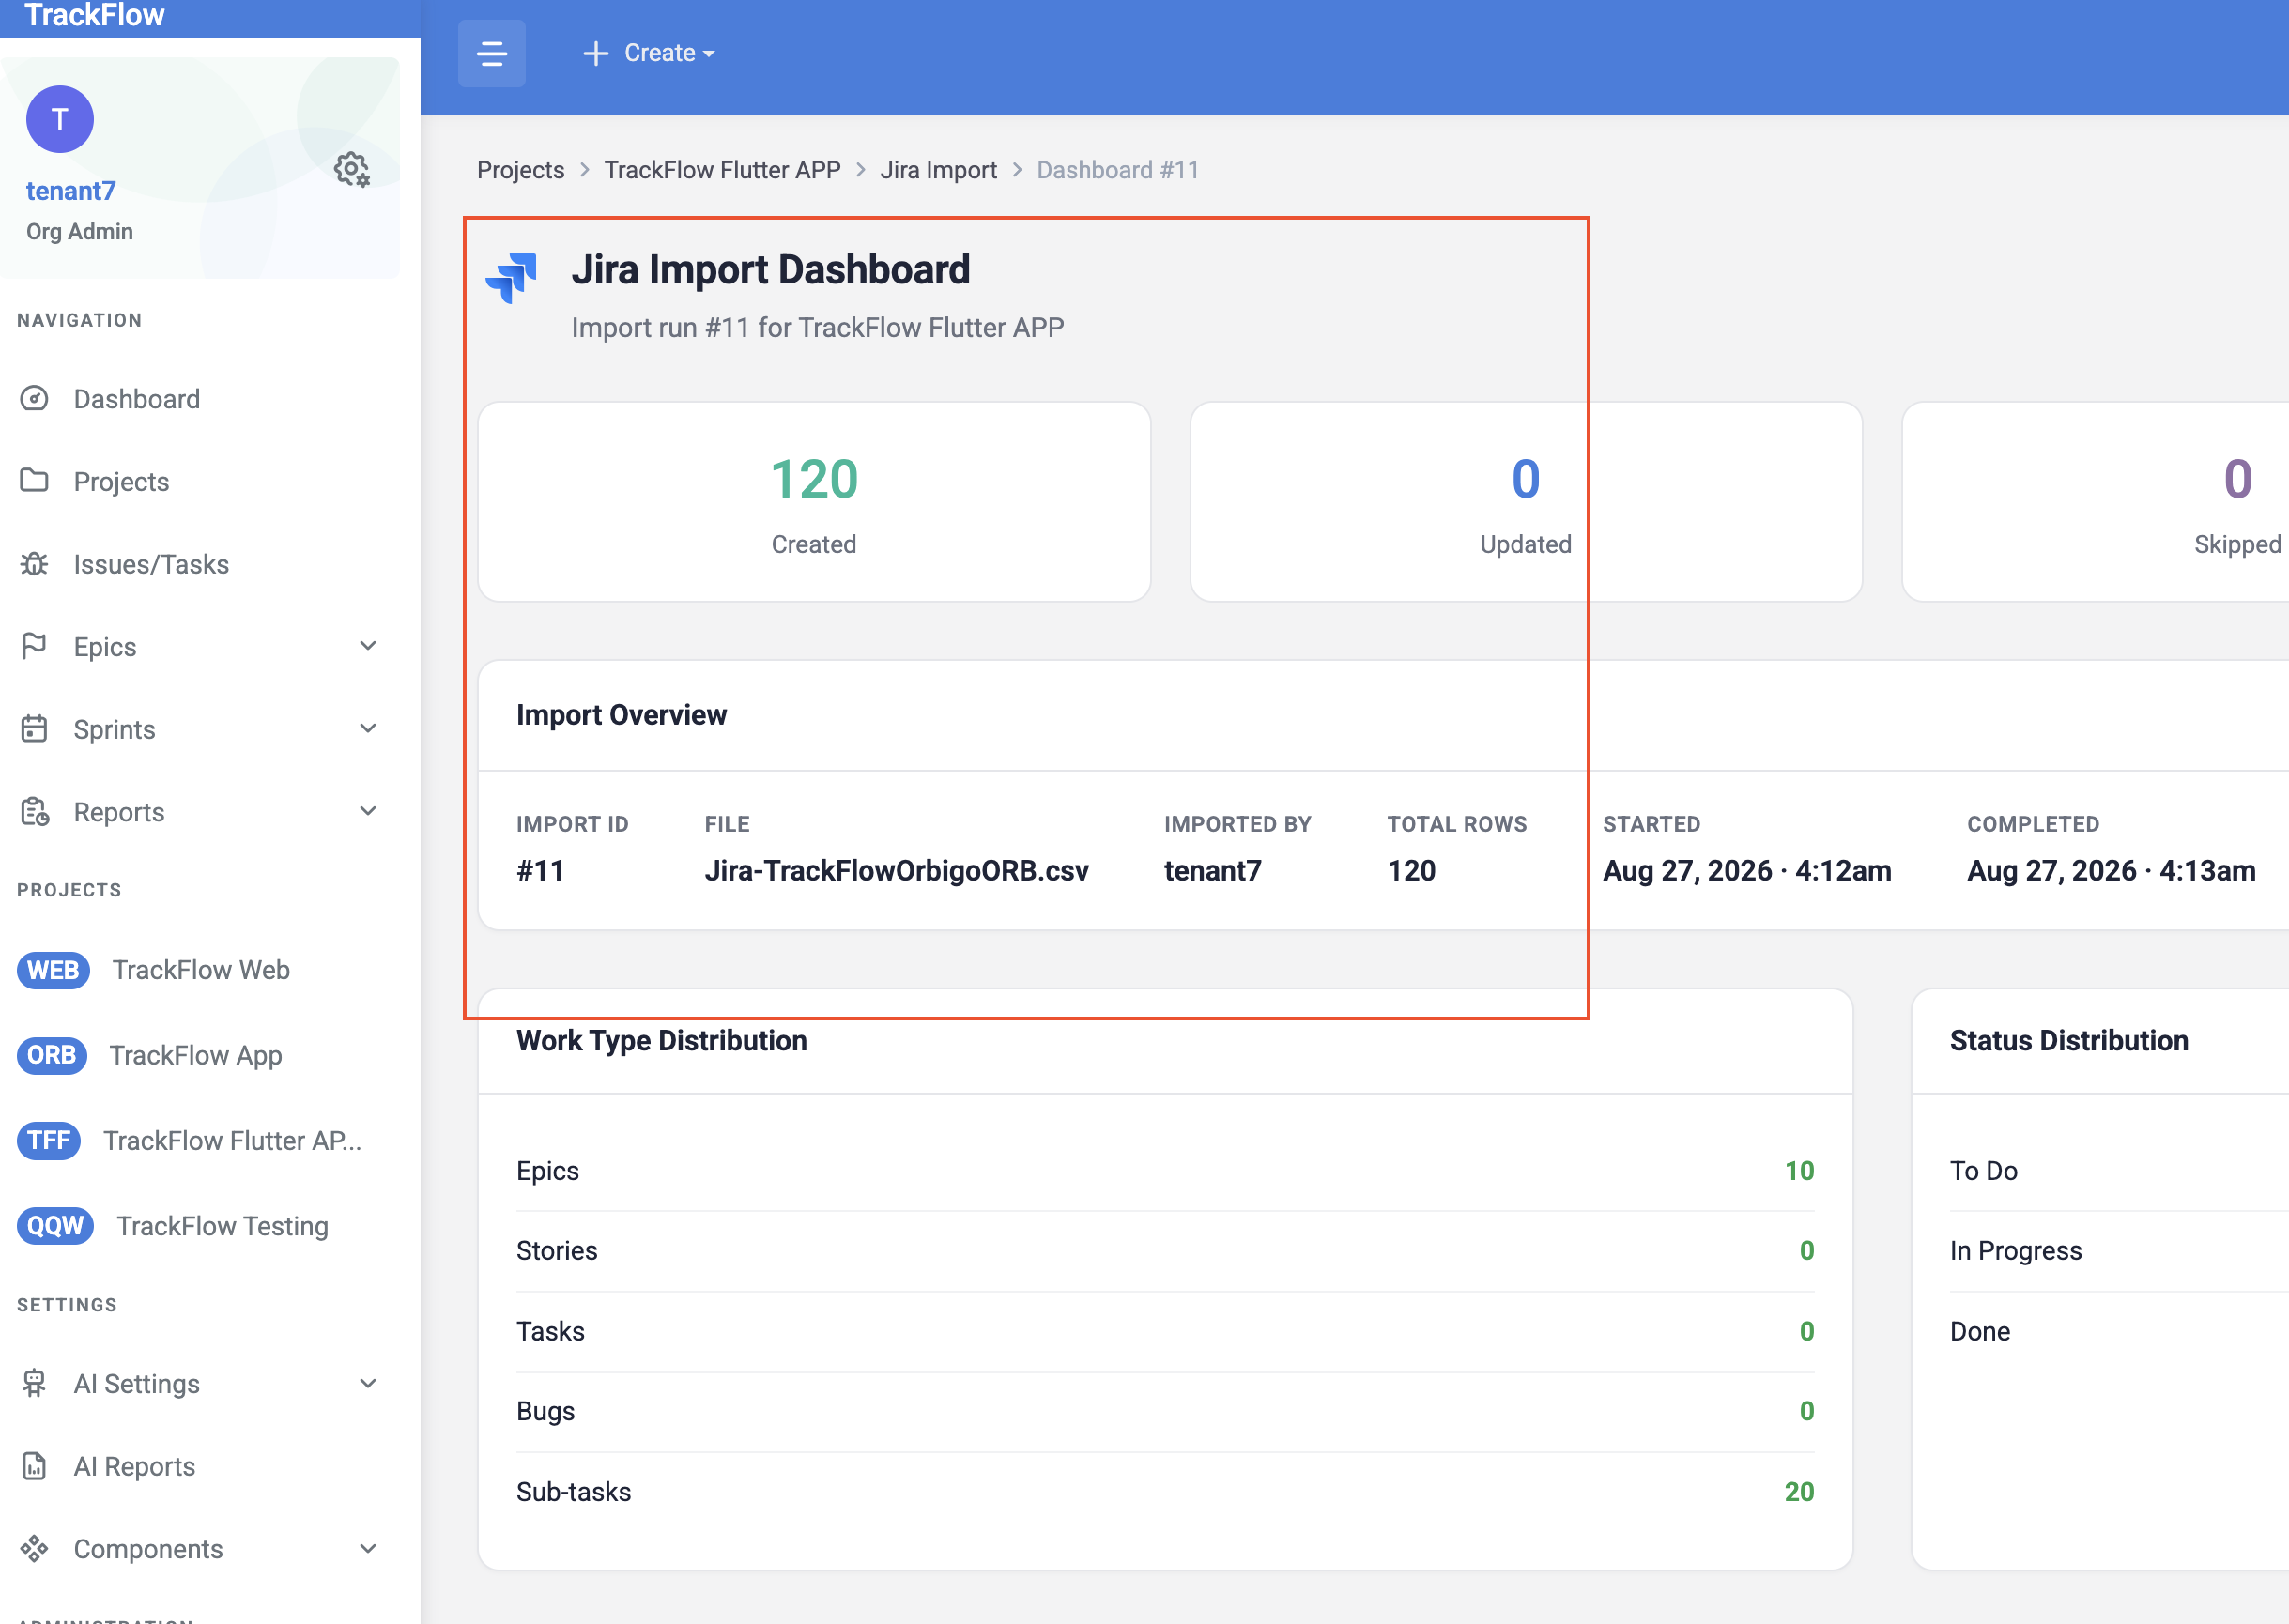
Your Jira Project Has Been Imported Successfully
TrackFlow will import supported Jira work items and organize them within your selected project.
Go to Project